Wednesday, January 12, 2011

How to Install Full Frame Replacement Windows

Well, the title of this post says it all: I'd like to help you tackle your window installation project.  Specifically, this blog deals with full frame replacement windows.  That means that all interior casing is removed and the entire old window unit is removed, down to the stud wall and rough opening, so that a new window can be installed.  The other type of more common renovation is a "replacement window" or "insert window."  These make use of the existing interior casing and window frame, but you put in a new weather-tight sash unit.  I'll cover that type of window replacement later in this blog, or in another blog soon.

Full frame replacement is more expensive and a lot harder to do.  However, the result will be a superior appearance (they won't look like "replacements"), better energy efficiency, and potentially a larger window.  This is because insert replacements are slightly smaller than the existing windows, whereas full frame replacements can often be larger than the existing windows because you may gain space on the sides where the old windows' counter balance weight system was housed.

In the example you'll see below, the windows are installed in a wood frame, brick sided house.  The original windows would have been installed into the walls before the brick veneer was added to the outside.  This presents some challenges for removal of the old, and installation of the new, but it is certainly possible and well worth the effort.  

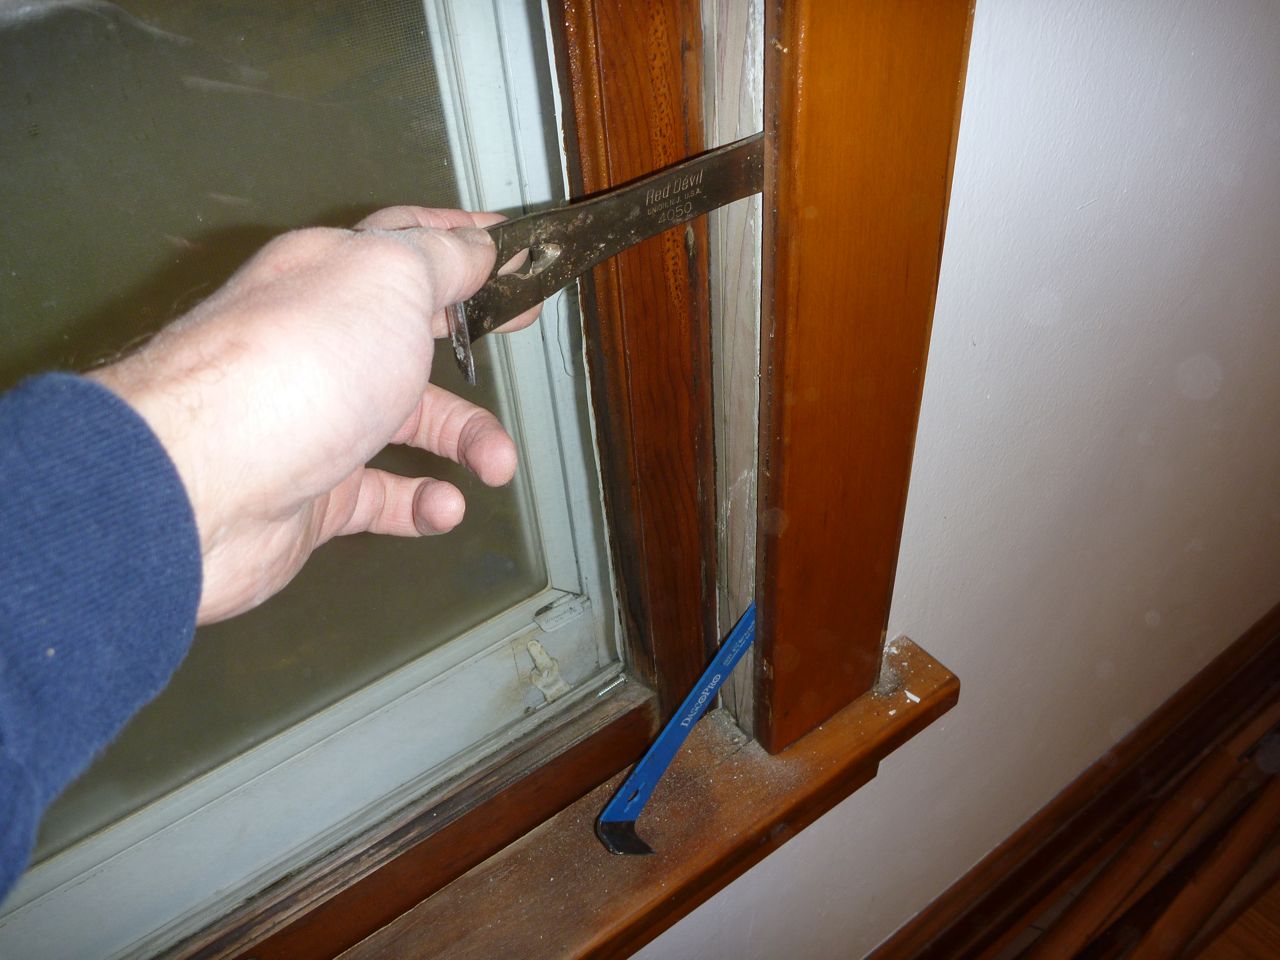
This project can be accomplished with relatively few tools and basic skills.  You'll need a good ladder (windows are always installed from the outside), decent tape measure and level, pry bars, a drill, and quite possibly a reciprocating saw (a Sawzall or Tiger Saw).  If you're building the interior casing you may need access to a router, miter saw and table saw.

Let's get started!

Preparing the Rough Opening for the New Window

Once you have everything out, the opening will look like this:


This photo shows why the new windows must be measured to fit the opening provided by the brick exterior.  You will slide them in from the outside and they need to fit as close as possible, but if they are too big, you're in trouble!  Caution: the bricks were laid by hand, so measure each window opening carefully at several places to make sure you order windows that will fit.  If you go with a quality supplier, they should offer to come to your house for a consultation and take free measurements.

What you will discover is that there is "extra" space where the weights were located.  This area may now be recessed into the wall cavity. What you want is a flat, square opening all around the window.  In this picture you can see that I used some scrap wood (actually a piece of the casing) to furr out, or extend, the rough opening so it is flush with the brick.  (The old casing happened to be the right dimension, but you may need to cut something to fit.) This will make it easier to insulate, and provide a solid surface for screwing in the new window.

At this time you should also clean up the outside brick.  Chisel off any old caulk or pieces of mortar that stick out far enough to prevent window installation.

Trimming the plaster.  You will go through several blades per window!
Because of those window weights the inside wall board (or in this case plaster wall) is not as wide as the rough window opening.  You have to fix that, so the new window will slide into place.  Once you have made any width adjustments to the newly-revealed studs, trim the wall board flush with your "new" rough opening, i.e., in line with the brick exterior.  This is one dusty, messy process.

Here is a look at the trimmed and cleaned-up opening, from the outside:
Note that everything in the vertical plane is flush, solid and cleaned up.
Note: You may also need to furr (extend) or trim the top of the opening (the header board) and/or the bottom of the opening.  It depends on how it was built originally, but just do whatever is needed to create a solid, level, square opening that lines up with the brick and will accommodate the dimensions of the new window.  That said, it is a rough opening, so don't get carried away.  You are only creating a space for the new window, not doing finish work just yet!

Remove the casings, stool, apron and take the frames out of the opening.

Once you have removed all the casings your window will look like this...

The flat ledge board at the bottom is the stool, and the trim board below it is the apron board.  These are often nailed in pretty well, so get out the crowbar, saw or whatever it takes to rip them out.


Here's the end of the interior demolition:


Now you can remove the window sashes (the actual framed glass pieces), remove the storm windows, cut the sash cords for the counterweights, and remove the window frames.  The window frame is nailed into the rough opening and you will have to pry it, cut it with a circle saw or Sawzall, bang it out with a hammer, etc. I like to use a hard rubber mallet.  The wood will splinter, so wear those glasses.  Keep in mind you will not be reusing any of this material here, so go nuts.  You should be able to recycle the iron weights and do what you can to reduce landfill by re-using the lumber if you have do other projects.


Removing the Original Windows


Here's what we're starting with.  These windows are from 1930.  Single pane of glass and not much insulation value.  The windows are framed in a "secondary" wood - not oak like the dining room or living room - and they are pretty beat up.  So, let's rip out the whole shebang and install some quality full frame replacements.


Step 1: The Demolition - Remove Interior Casings
Clean everything out of the room because its going to get messy.  You have to take a deep breath, pick up your favorite pry bar, and start anywhere.  Remember: Pry Bar = Safety Glasses.  Buy a good pair of comfortable, clear glasses and use them!
Pry off the backband
Pry off the window stop

Pry off the casings